
The “Fussy Cut” technique gets its name from the definition of “Fussy” = requiring careful attention + “Cut” = the removal of areas of Fabric via the use of Scissors. In other words instead of merely placing Paper Pattern pieces on the fabric in a haphazard manner careful attention is given to the location of the Paper Pattern piece in order to make the best use of particular areas, features, patterning and colours of the chosen fabric.
Abstract Fabric which is free of representational qualities such as the one in the photograph below provides scope for various arrangements. Paper Pattern pieces can be positioned to take advantage of areas of similar Colour (e.g. the Pink, Orange, Blue and Purple zones) or those with similar Patterning (e.g. Spots, Specks, Stripes). Other Abstract or geometric Fabrics may have design features such as Zigzags/Chevrons, Checks, Swirls etc.
Because all Abstract Fabrics are different and the potential possibilities (even if using the exact same Fabric as shown) will vary depending on ‘how’ the Fabric has been cut from the roll this Tutorial is simply a Photographic Record of how I Fussy Cut a ‘crazy’ piece of Abstract Fabric rather than an exact procedure to be followed. Use the ideas, logic and concepts illustrated and apply them to the particular Fabric that you wish to “Fussy Cut”!

Looking closely at the Fabric it is possible to identify various major zones of Colour for example there are large areas of Pink, Orange, Blue and Purple. Each of these major zones also has a pattern made up of varying sized Dots & Spots plus also Dot on Spot features.
Several Pinks have been used ranging from very Pale Pink, (peach) Mid Pink, Pink and a Bright (Lipstick) Pink. Two different Purples have also been used a Light (Mauve) Purple and a Dark Purple that is almost a Magenta colour. Added to these is Cyan and Orange.
The Cyan and Mauve both have Bright Pink Spots. The Dark Purple has either Cyan; Pink or Mauve Spots. The Pale Pink has either Mauve; Bright Pink or Dark Purple Spots & Dots of various sizes. The Bright Pink has large Spots and Streaks of Orange and the Orange areas have Bright Pink Spots. That lists just a few of the main decorative features and doesn’t include the Tans Spots and Orange Spots with the Dark Purple Dots. This is quite a complex intricate design!
The question now is what do I hope to achieve by using the “Fussy Cut” technique? This being a Finger Pocket Fish Tutorial the answer is simple. I wanted three Fish that were different yet also similar enough that they would look good together in photographs to illustrate my PDF Sewing Pattern. I was aiming for a mainly Pink, Blue (Cyan) and Orange Fish. The complex design of Colours, Spots and Dots would tie all three Fish together visually yet still allow for them to be different enough as individuals!
The fabric chosen has a Diagonal Repeat but sadly no Mirrored design so I needed to try to visualise what each BODY Side of the Fish would look like and what would happen along the centre ‘spine’ join on the Fish as well as where the BELLY Gusset would join the Sides. Plus as the Fish has a clever ‘finger pocket’ that allows for it to become a type of Puppet I wanted the BELLY Gusset & BELLY Pocket pieces to match. This required extra careful planning so that the same areas of the Fabric could be used. With this aim in mind I started to arrange Paper Pattern pieces on the Fabric.

Paying attention to the features of the Fabric the Paper Pattern pieces are positioned
For your Information: My preference is for Paper Pattern pieces, however see-though Templates would make placement even easier. Those able to use Reynolds (R) Freezer Paper which can be ironed in position may wish to print their Pattern Pieces onto it rather than onto regular Copy Paper.
When I was happy with the initial arrangement I pinned all the pieces in position making sure that the Nose tip end of the BELLY Gusset & BELLY Pocket pieces were positioned over corresponding areas of the Patterned Fabric.

“Fussy Cut” Layout aimed at creating three Fish with different shapes & colours
I carefully cut out the fabric pieces which resulted in the following three Fish.

The Paper Pattern pieces of Finger Pocket Fish 1 were positioned to create a Pink & Purple Fish
I was quite happy with the pieces for Finger Pocket Fish 1 as shown above although there was a little more Purple & Orange on the BODY Side than I would have liked!

The Paper Pattern pieces of Finger Pocket Fish 2 were positioned to create a mainly Orange & Pink Fish
The pieces for Finger Pocket Fish 2 as shown above were okay but I would have liked more Orange on the Belly and Fin pieces.

The Paper Pattern pieces of Finger Pocket Fish 3 positioned to create a Blue & Pink Fish
Hmmm….. but I was not entirely happy with the result especially for Finger Pocket Fish 3 as shown above. I had enough Fabric left to cut out three more Fish. Perhaps with careful planning I could accomplish my aim as well as having another three Fish that also had mainly Pink, Orange and Blue areas.
Time to take another careful look at the Fabric and see if I could position the Paper Pattern pieces in such as way that I could Mix & Match and swap pieces around to achieve 6 individual fish that looked like all the pieces should go together.

2nd attempt at “Fussy Cutting” aiming at swapping some of the pieces from the 1st “Fussy Cut”
Again I carefully cut out the Fabric pieces which resulted in the following three Fish.

The Paper Pattern pieces of Finger Pocket Fish 1 were positioned to obtain these Fabric pieces.

The Paper Pattern pieces of Finger Pocket Fish 2 were positioned to obtain these Fabric pieces.

The Paper Pattern pieces of Finger Pocket Fish 3 were positioned to obtain these Fabric pieces.
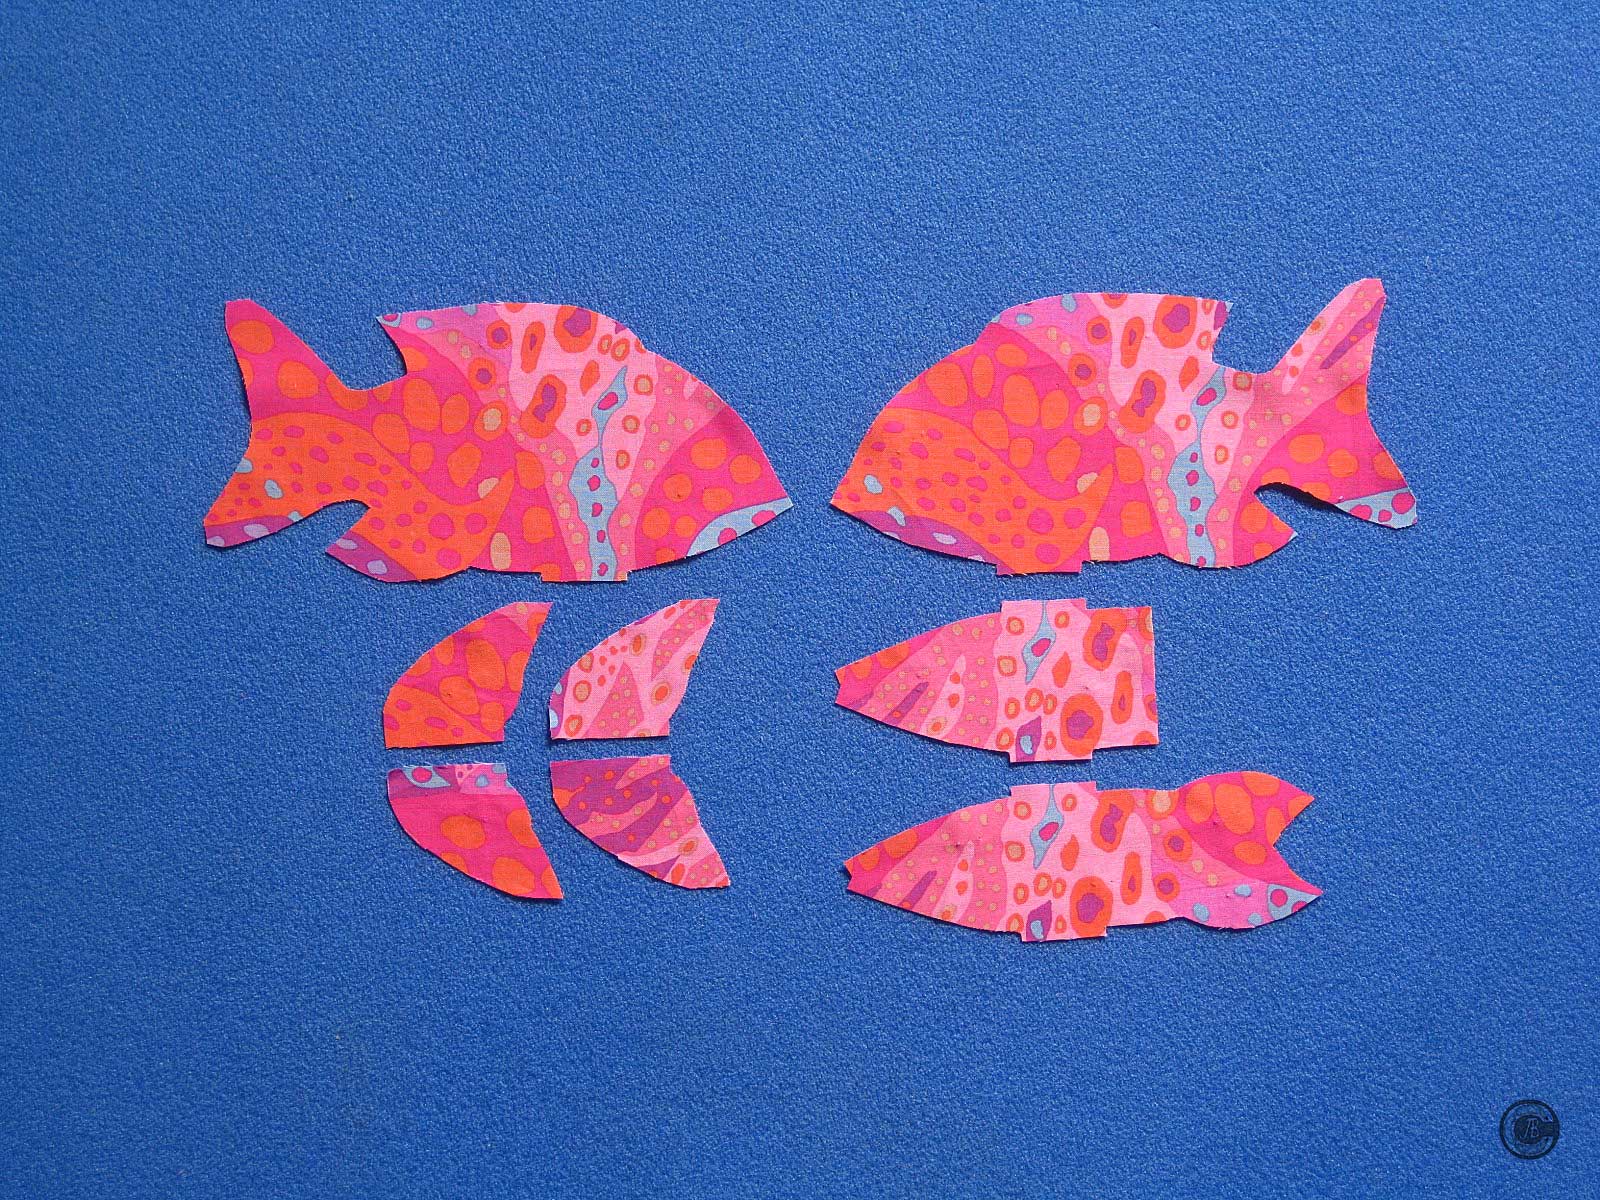
Now it was time to swap the pieces around to achieve a better result as shown below.

Swapping pieces resulted in two Fish that had pieces that suited each other much better!

Finger Pocket Fish 1 Pink and Purple

Finger Pocket Fish 1 Orange and Purple
By swapping the Finger Pocket Fish 2 Fabric pieces I also hoped to achieve a better result as shown below.

Swapping pieces resulted in two Fish that had pieces that suited each other much better!

Finger Pocket Fish 2 Pink and Blue Spotted
Finger Pocket Fish 2 Orange and Pink
Finally by swapping the Finger Pocket Fish 3 Fabric pieces I also hoped to achieve two very different Fish.

Swapping pieces resulted in two Fish that had pieces that suited each other really well! These are my favourite Fish!

Finger Pocket Fish 3 Orange and Pink

Finger Pocket Fish 3 Blue and Pink Spots
To illustrate the PDF Sewing Pattern I chose the following Fish Pieces:

Mix & Match the Finger Pocket Fish 1 “This Little Fishy” Fabric pieces to create a Pink and Purple Fish

Mix & Match Finger Pocket Fish 2 “That Little Fishy” Fabric pieces to create an Orange & Pink Fish

Mix & Match the Finger Pocket Fish 3 “Another Little Fishy” Fabric pieces to create a Blue and Pink Fish

Finger Pocket Fish 1 “This Little Fishy” Sewing Pattern PDF

Finger Pocket Fish 2 “That Little Fishy” Sewing Pattern PDF

Finger Pocket Fish 3 “Another Little Fishy” Sewing Pattern PDF
With a little planning and careful attention to the particular areas, features, patterning and colours of the chosen Fabric it is possible to “Fussy Cut” even the most unusual Abstract Fabric!
If you would like to purchase a Finger Pocket Fish Sewing Pattern PDF they can be found in my Esty shop or on Craftsy. Keep your ‘eyes peeled’ for the 14th of November 2014 release of three individual PDF Sewing Patterns plus one PDF containing All Three!
Finger Pocket Fish 1 “This Little Fishy” Sewing Pattern PDF
Finger Pocket Fish 2 “That Little Fishy” Sewing Pattern PDF
Finger Pocket Fish 3 “Another Little Fishy” Sewing Pattern PDF
Finger Pocket Fish “Net All Three” Sewing Pattern PDF
